Forward in-app purchases on Android
When users make an in-app purchase, we receive data in three ways:
- The justtrack SDK, when properly configured, forwards the transaction to our backend.
- The Google Play Store sends a notification to our backend.
- Our backend requests the transaction's price information from Google Play.
In this guide, you'll learn how to configure your accounts in justtrack and Google Play so we can receive the necessary data from each of these sources.
SDK setup
Read our SDK documentation page on tracking revenue for setup instructions.
Create a service account
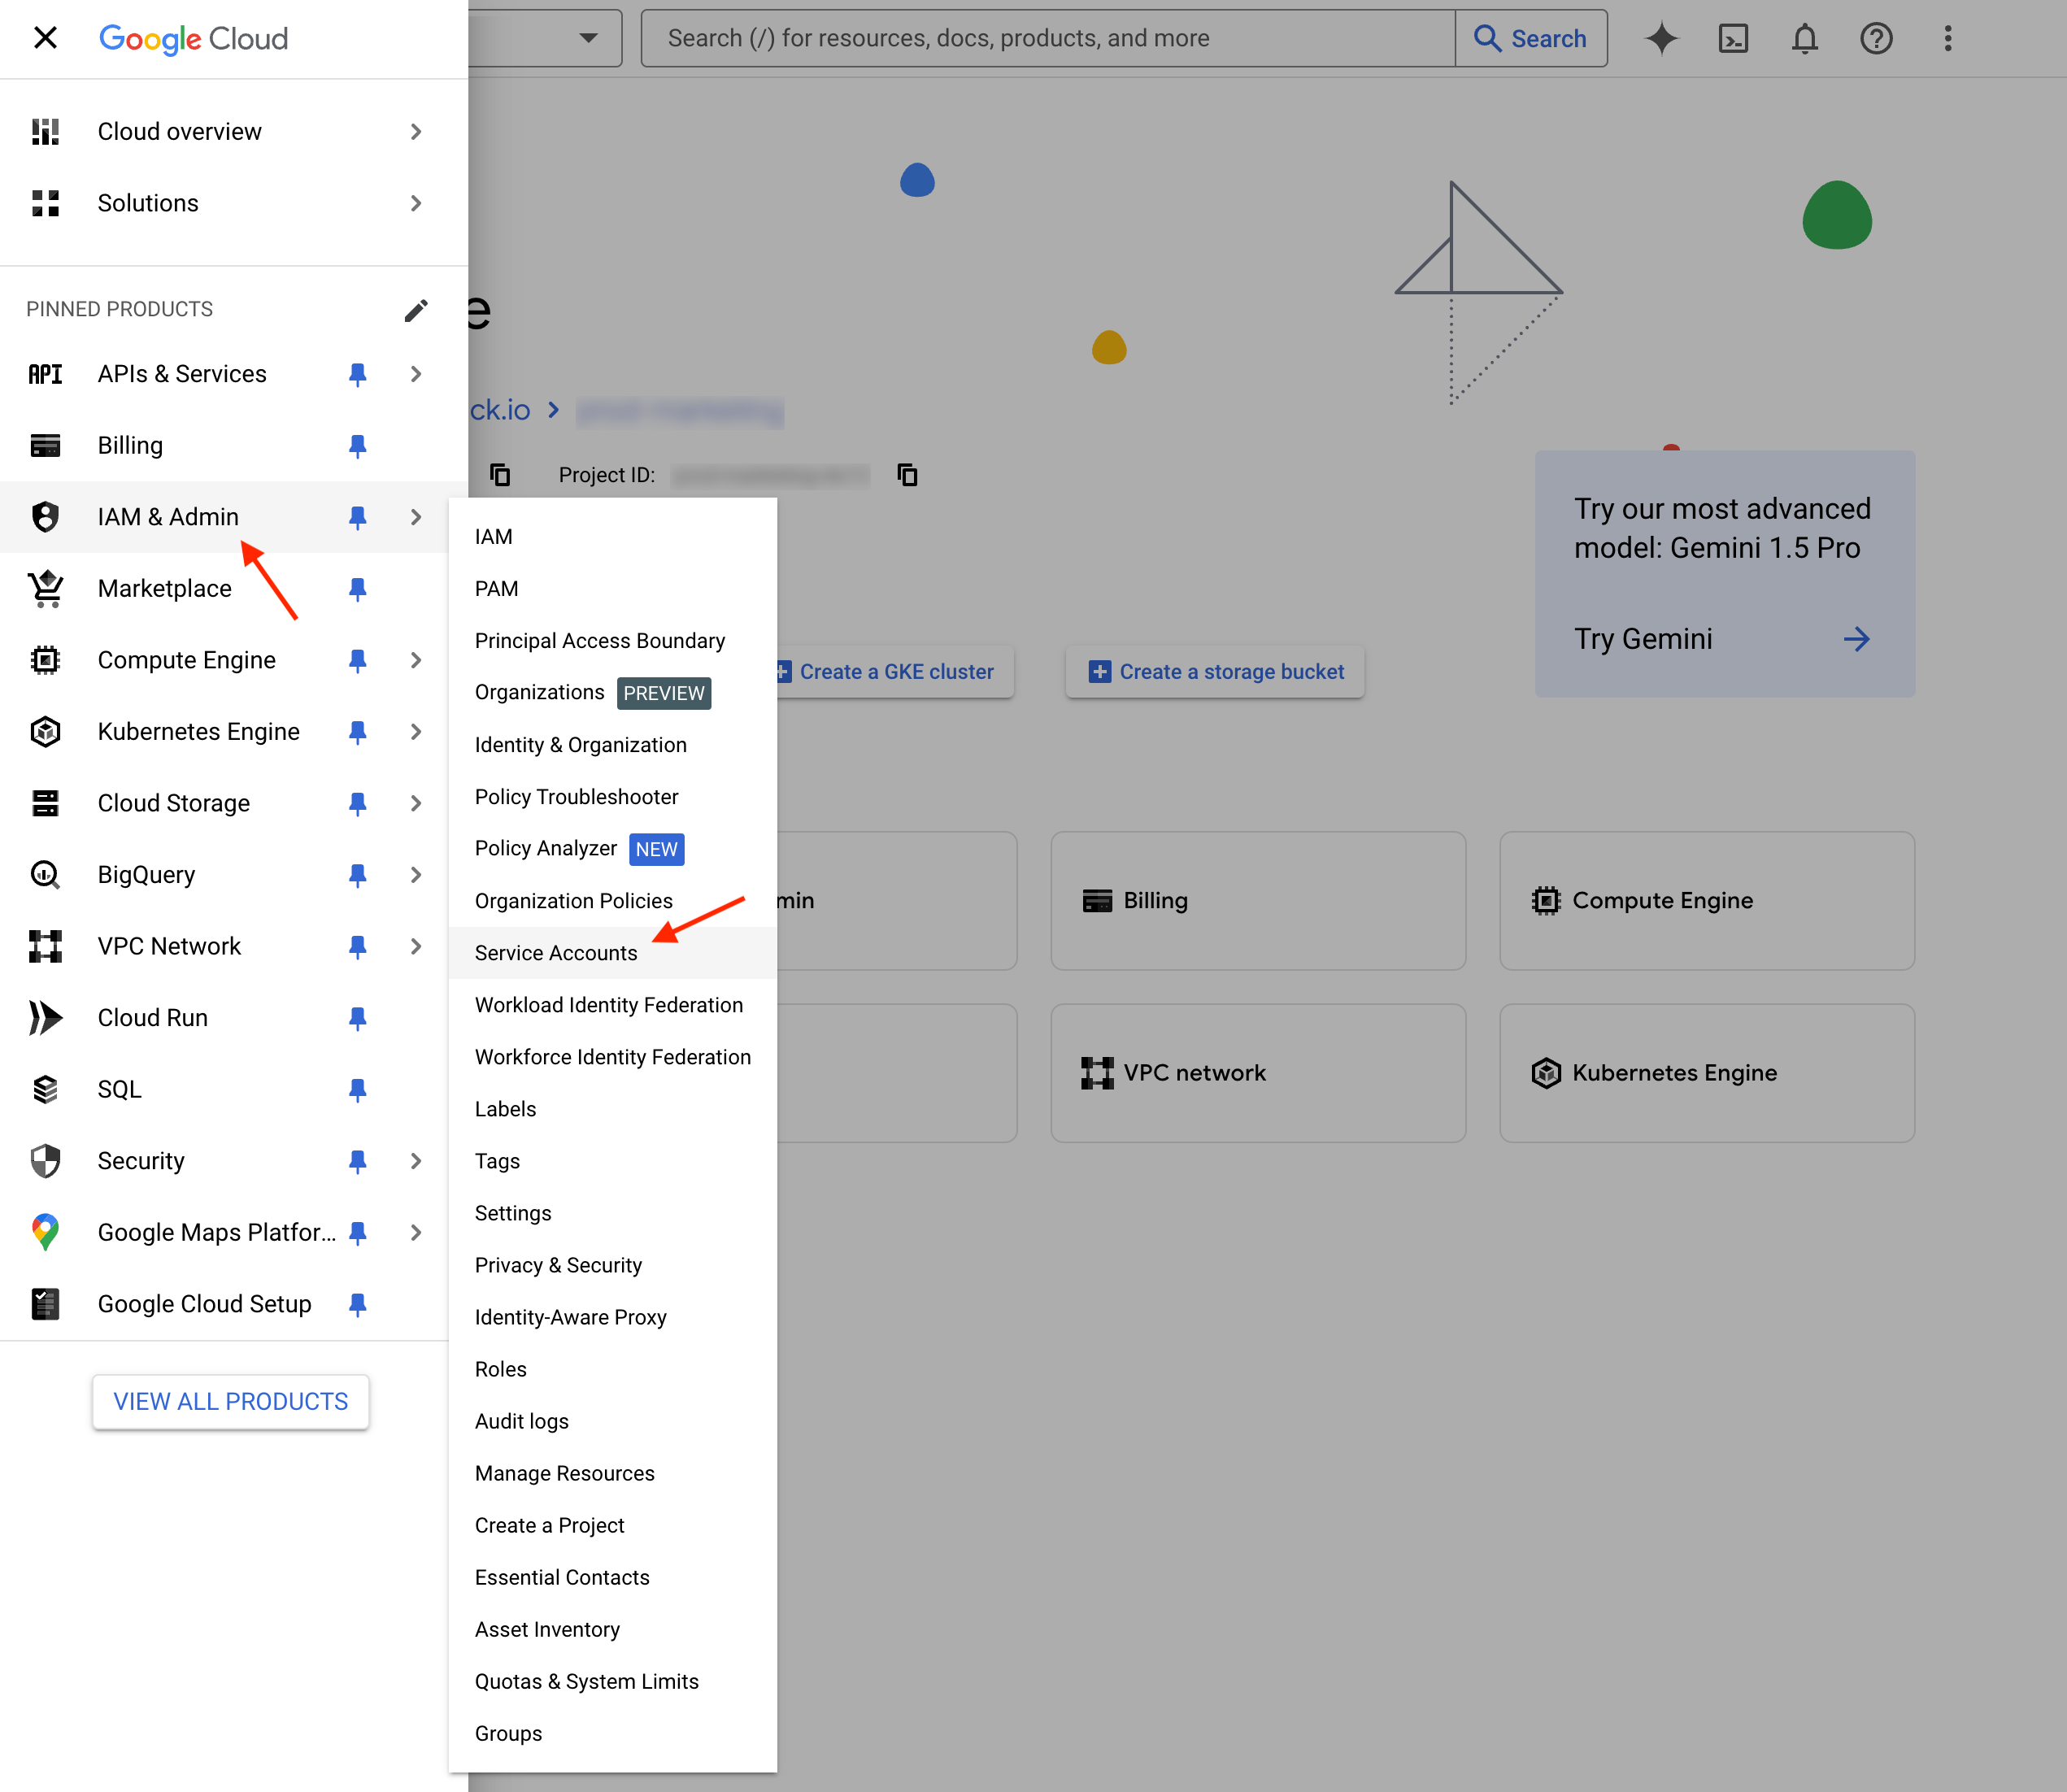
In Google Cloud, navigate to IAM & Admin > Service Accounts:
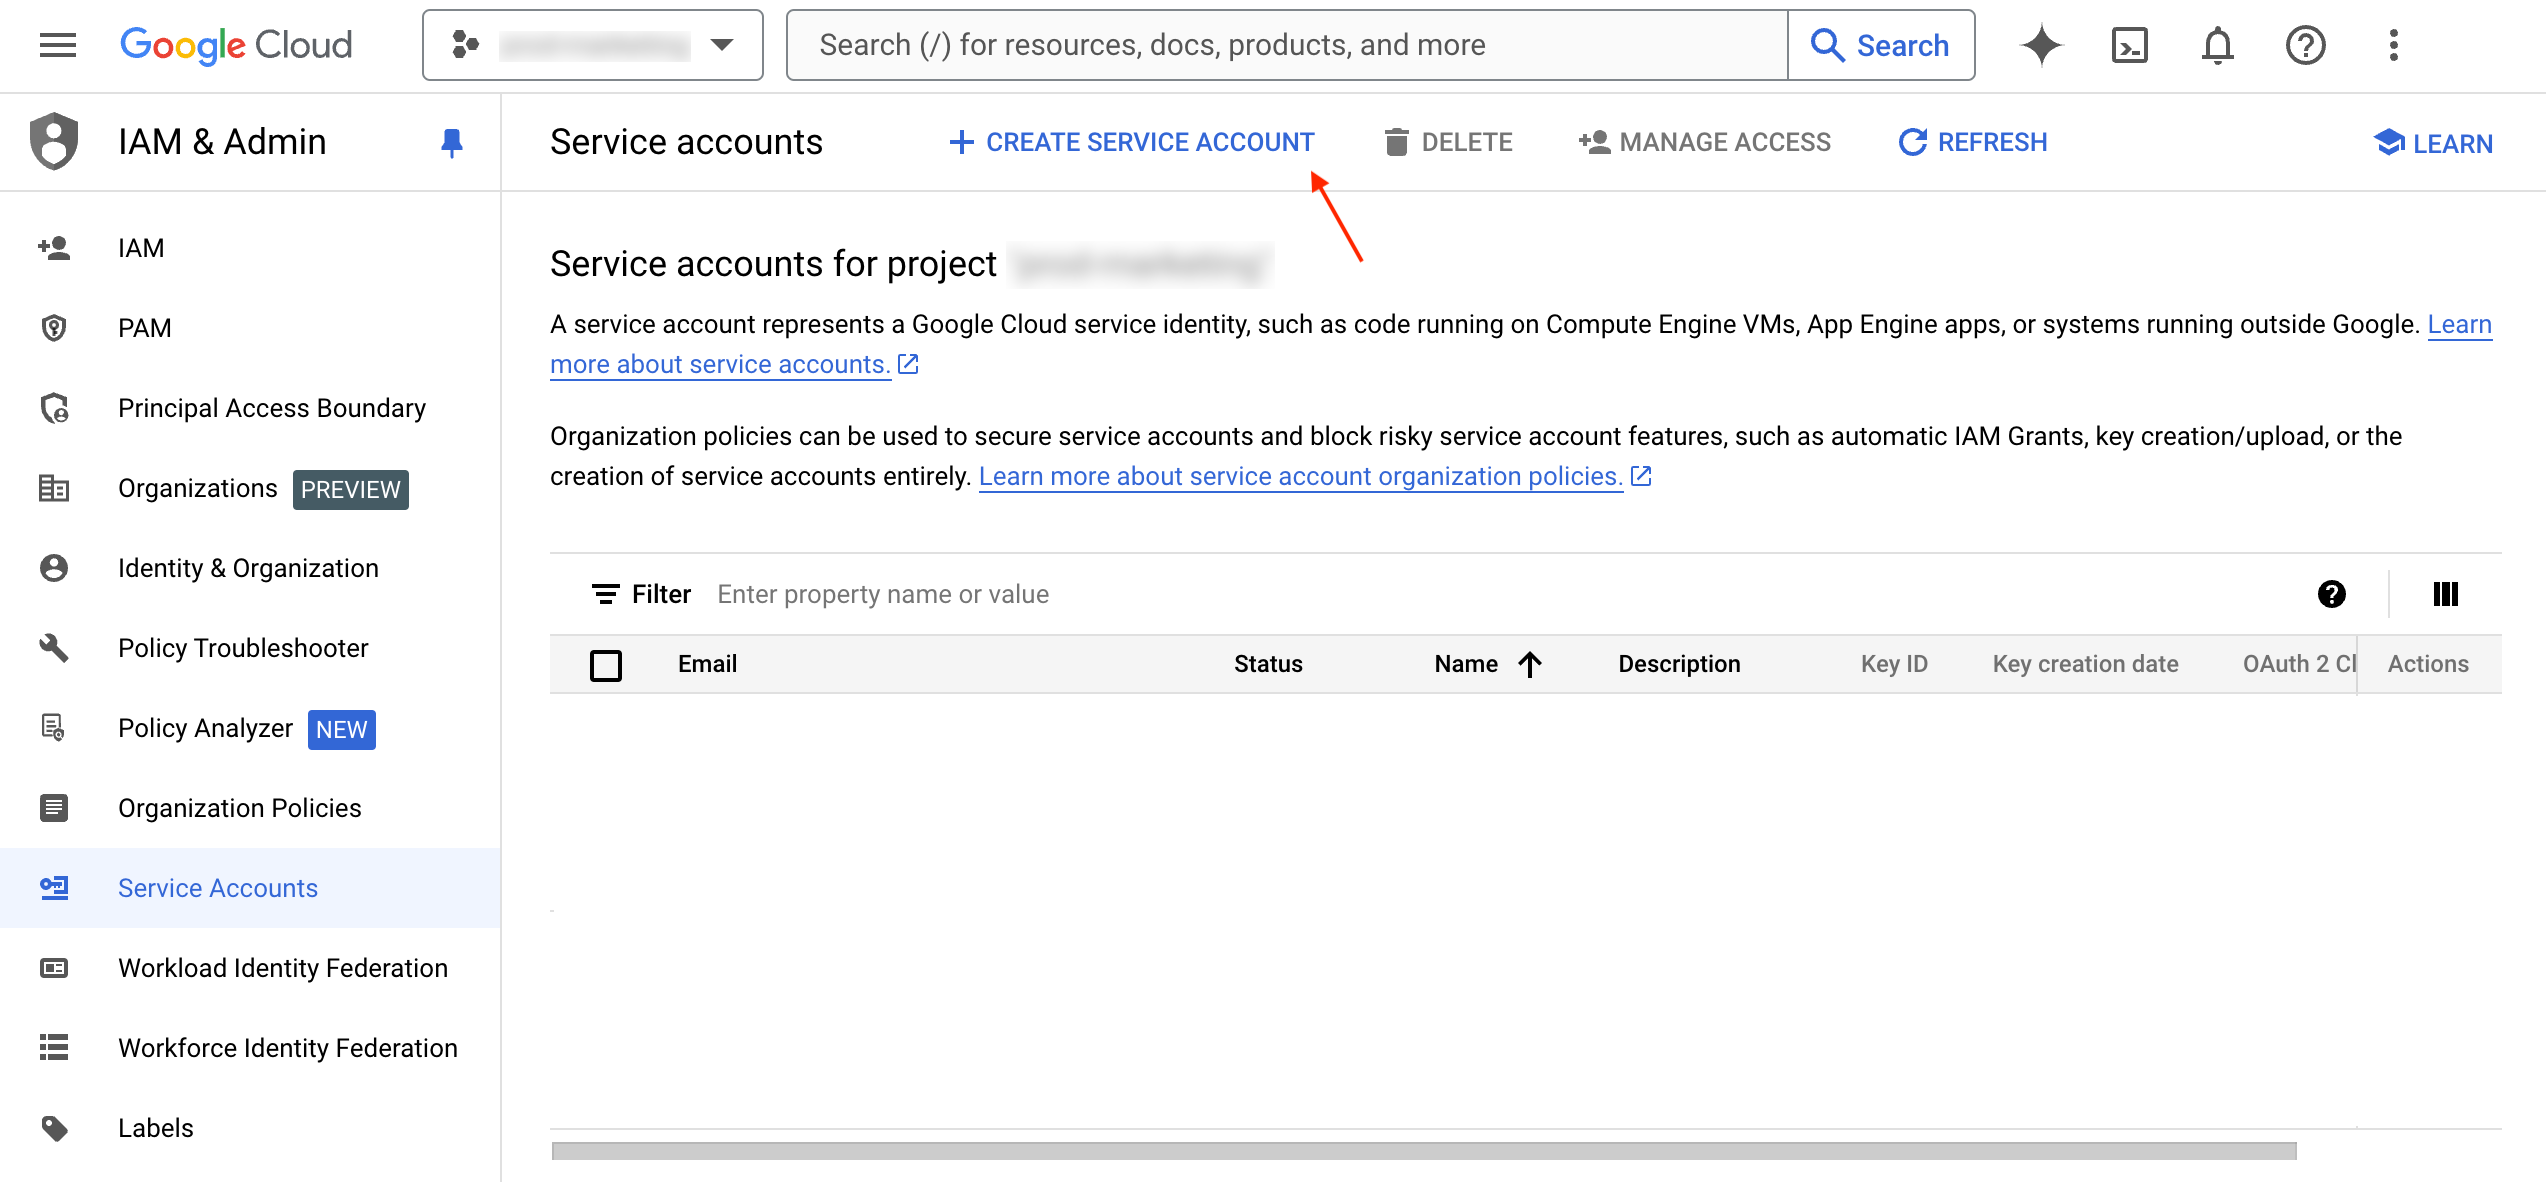
Click CREATE SERVICE ACCOUNT:
Provide the following service account details:
- Name: "justtrack IAP Verification"
- Description: "Allows the justtrack backend to request IAP price information"
Then, click Create and continue.
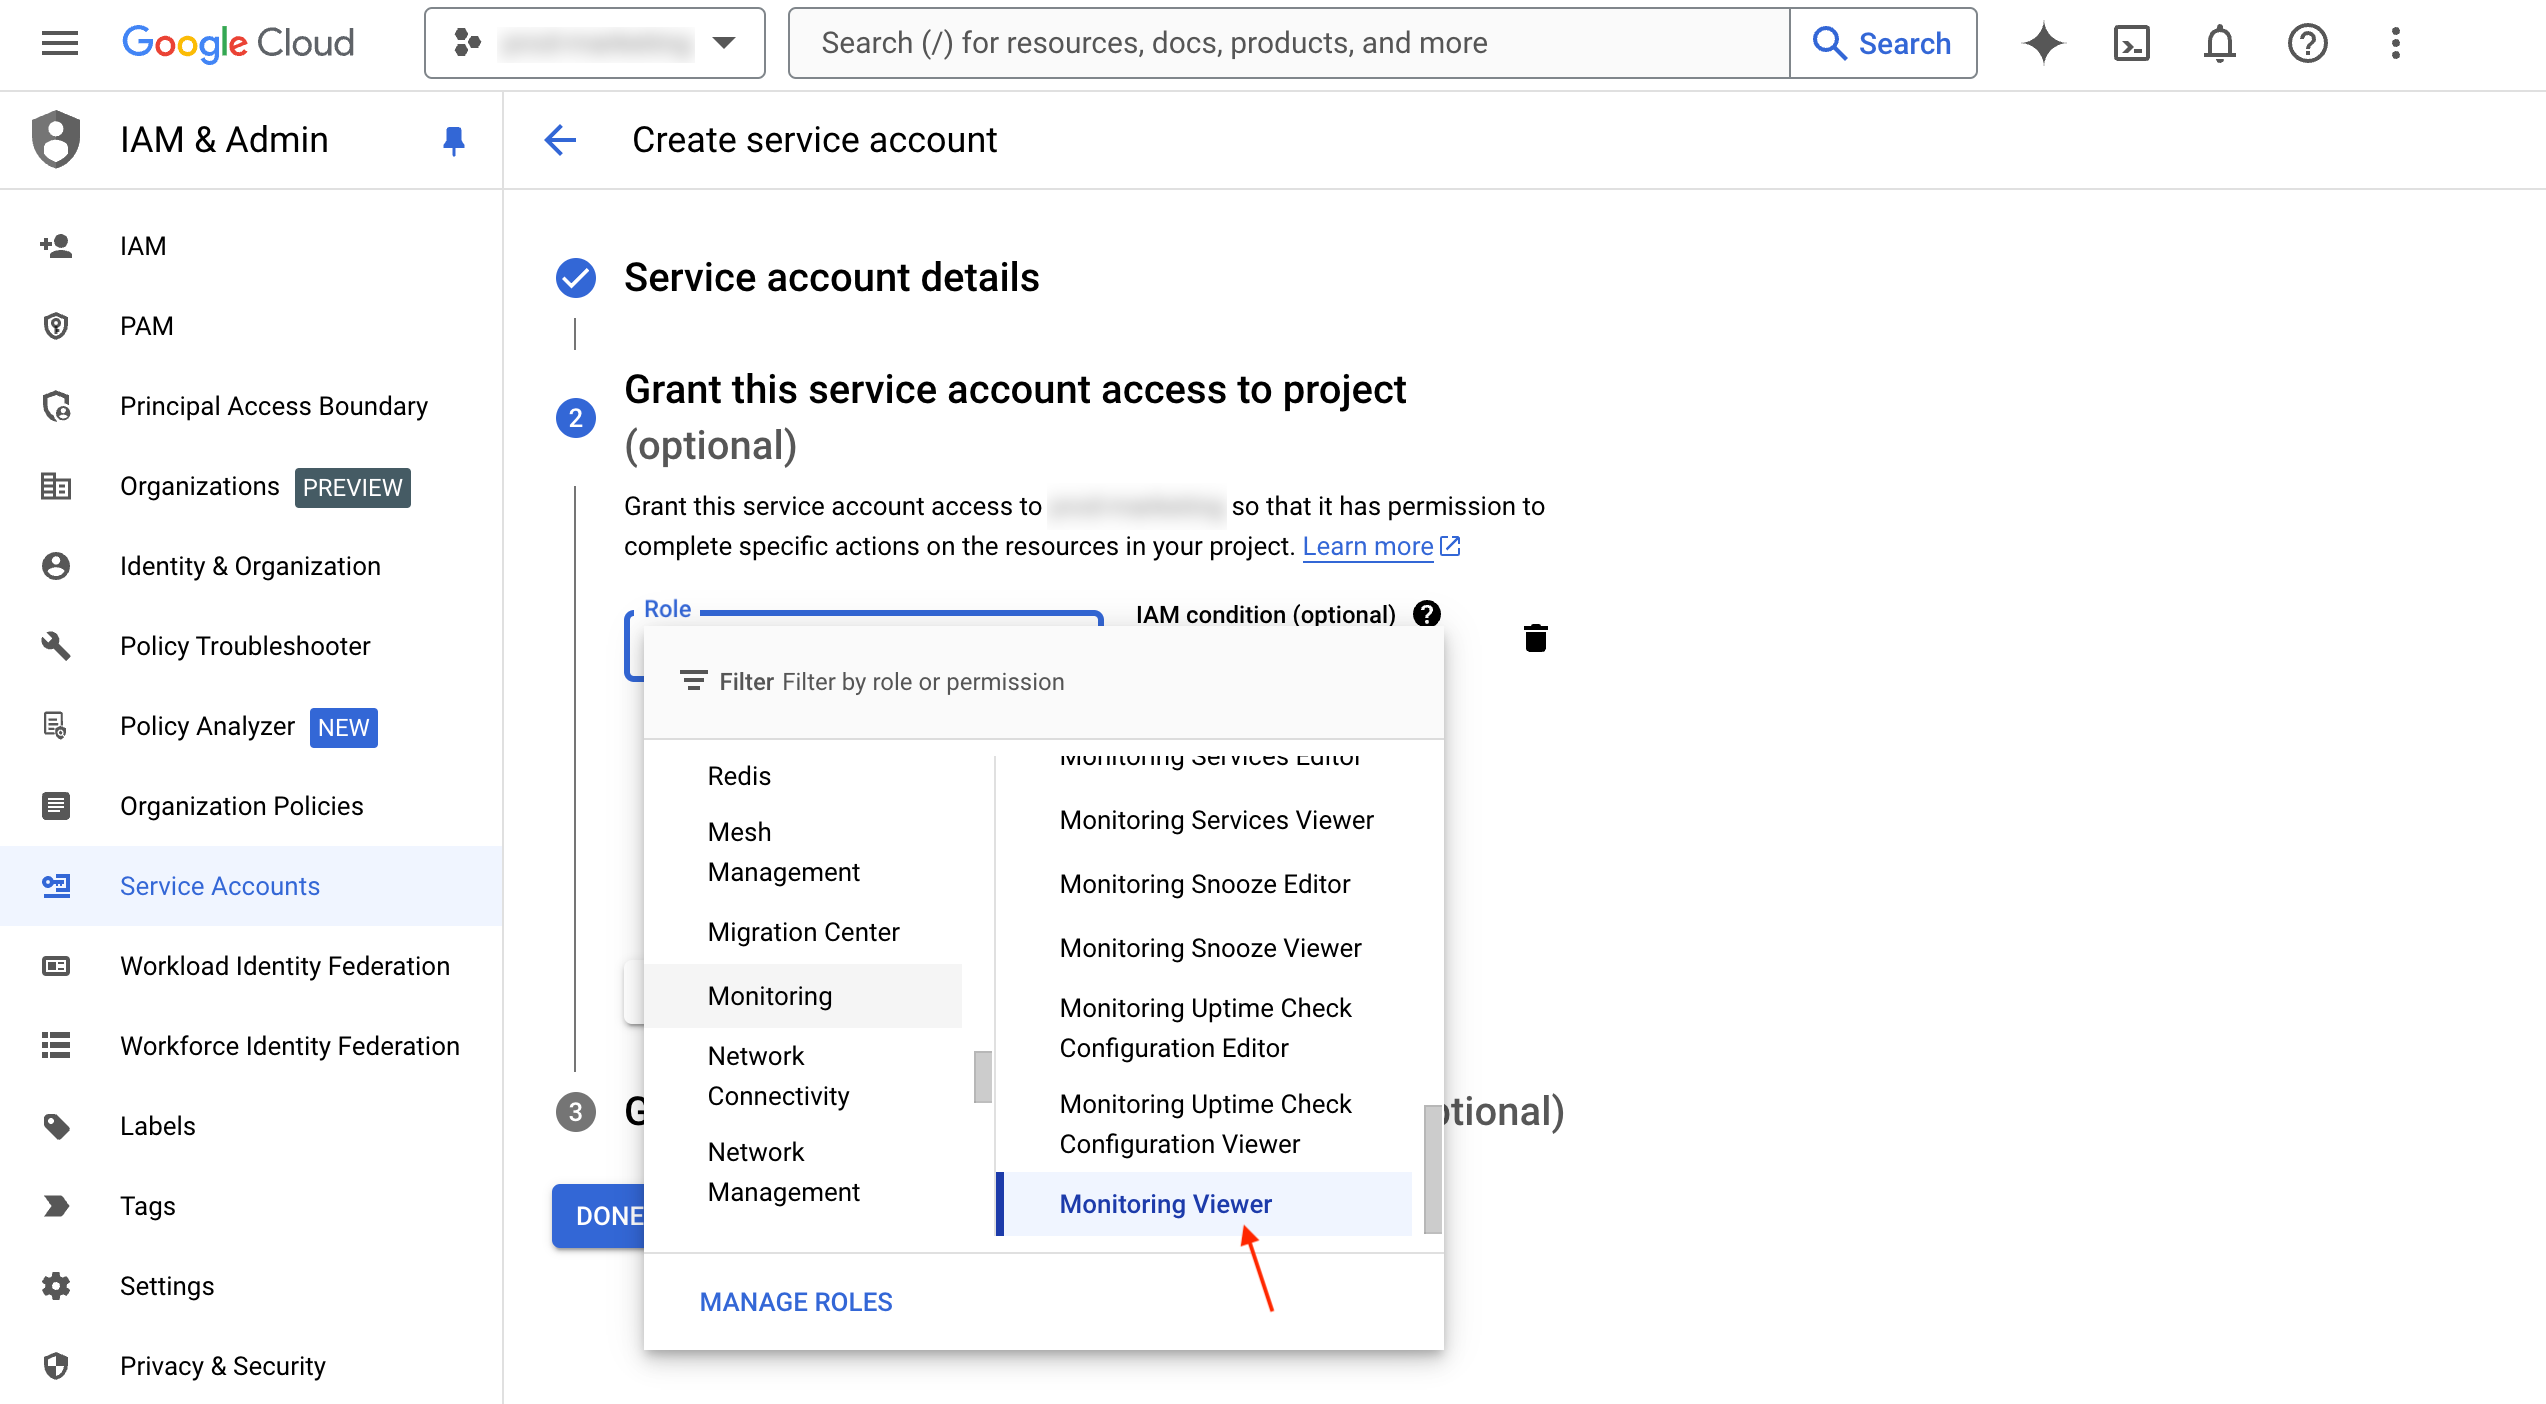
In the next step, select the Monitoring Viewer role:
Click Done. This will return you to the service accounts list. From here, copy the justtrack-iap-verification email for the service account you just created. You'll need this later.
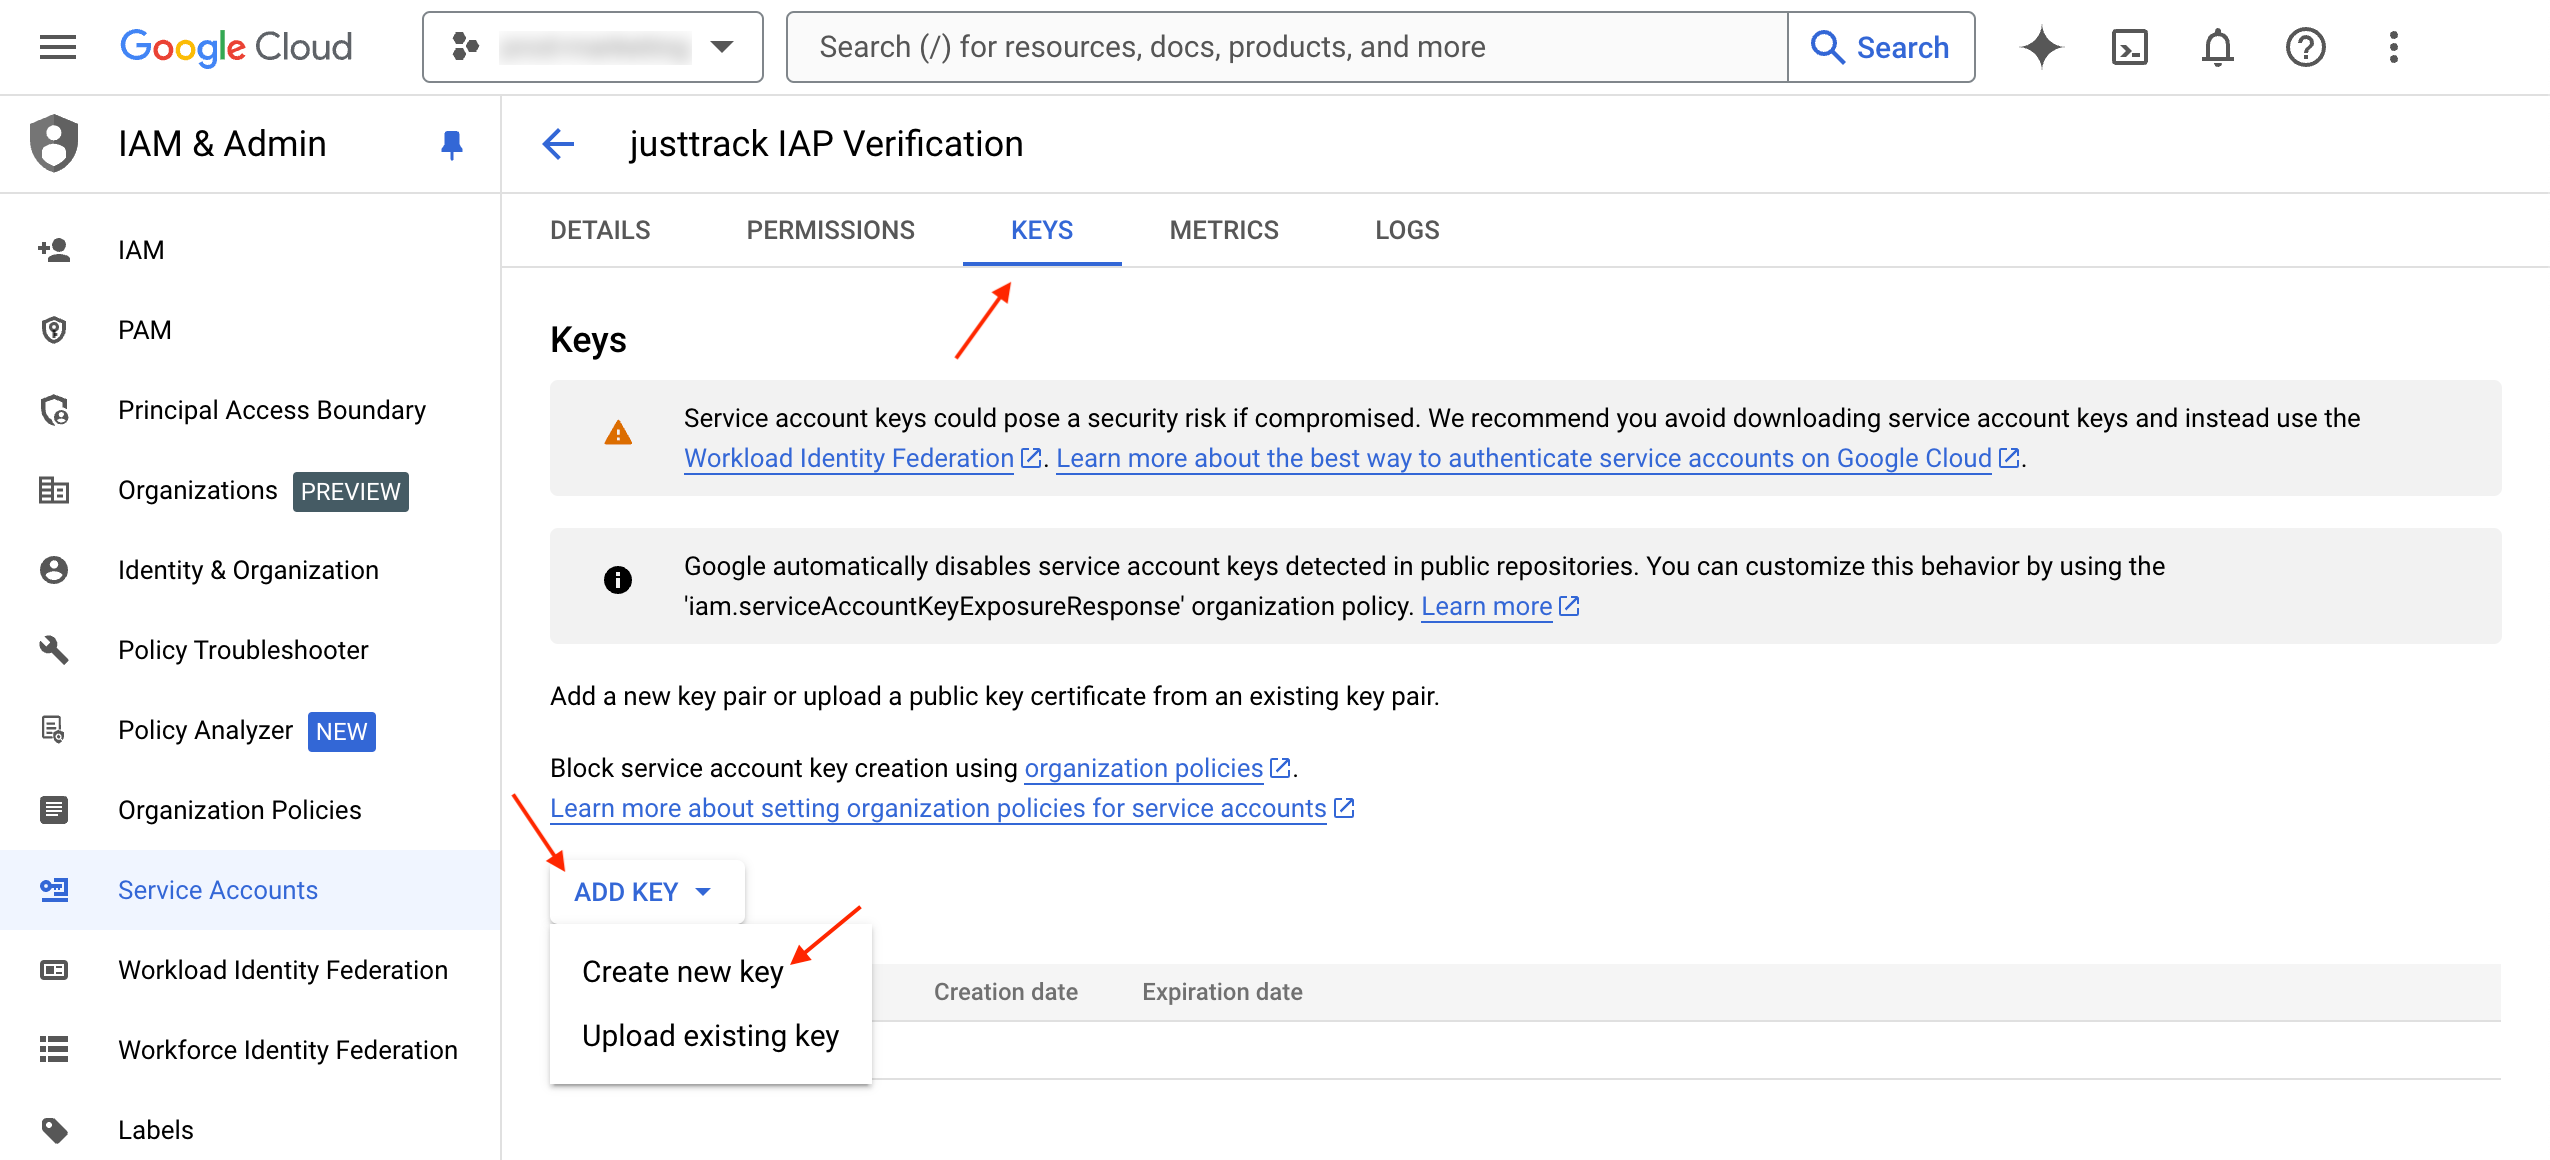
Next, go to the Keys tab and select ADD KEY > Create new key:
Create the key in JSON format:
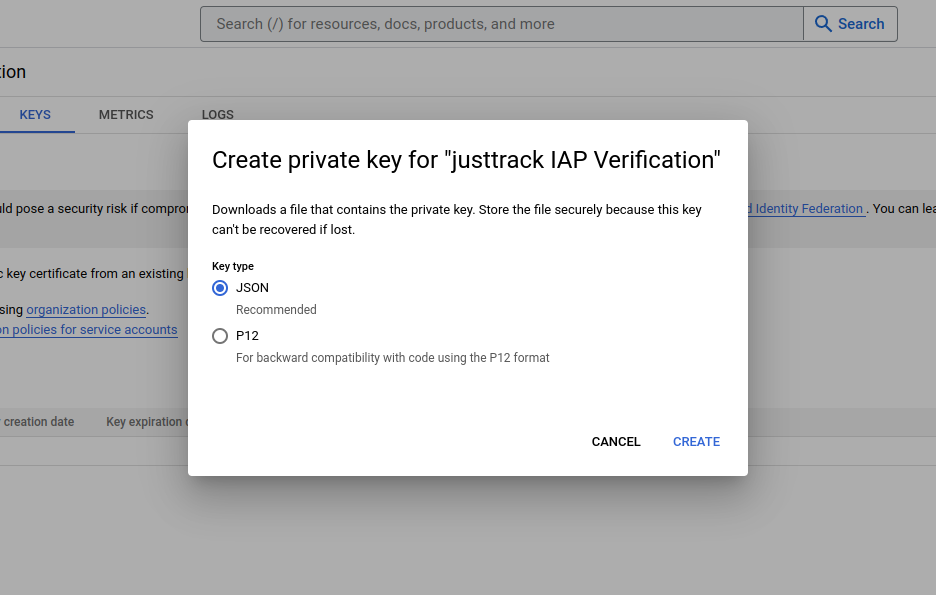
Once you create the key, it will be automatically downloaded to your computer. You'll upload this to the justtrack platform in a future step.
Now, you need to grant access to the email you copied earlier. Go to the Google Play Console, and select your developer account.
In the left navigation, go to Users and permissions and click Invite new users:
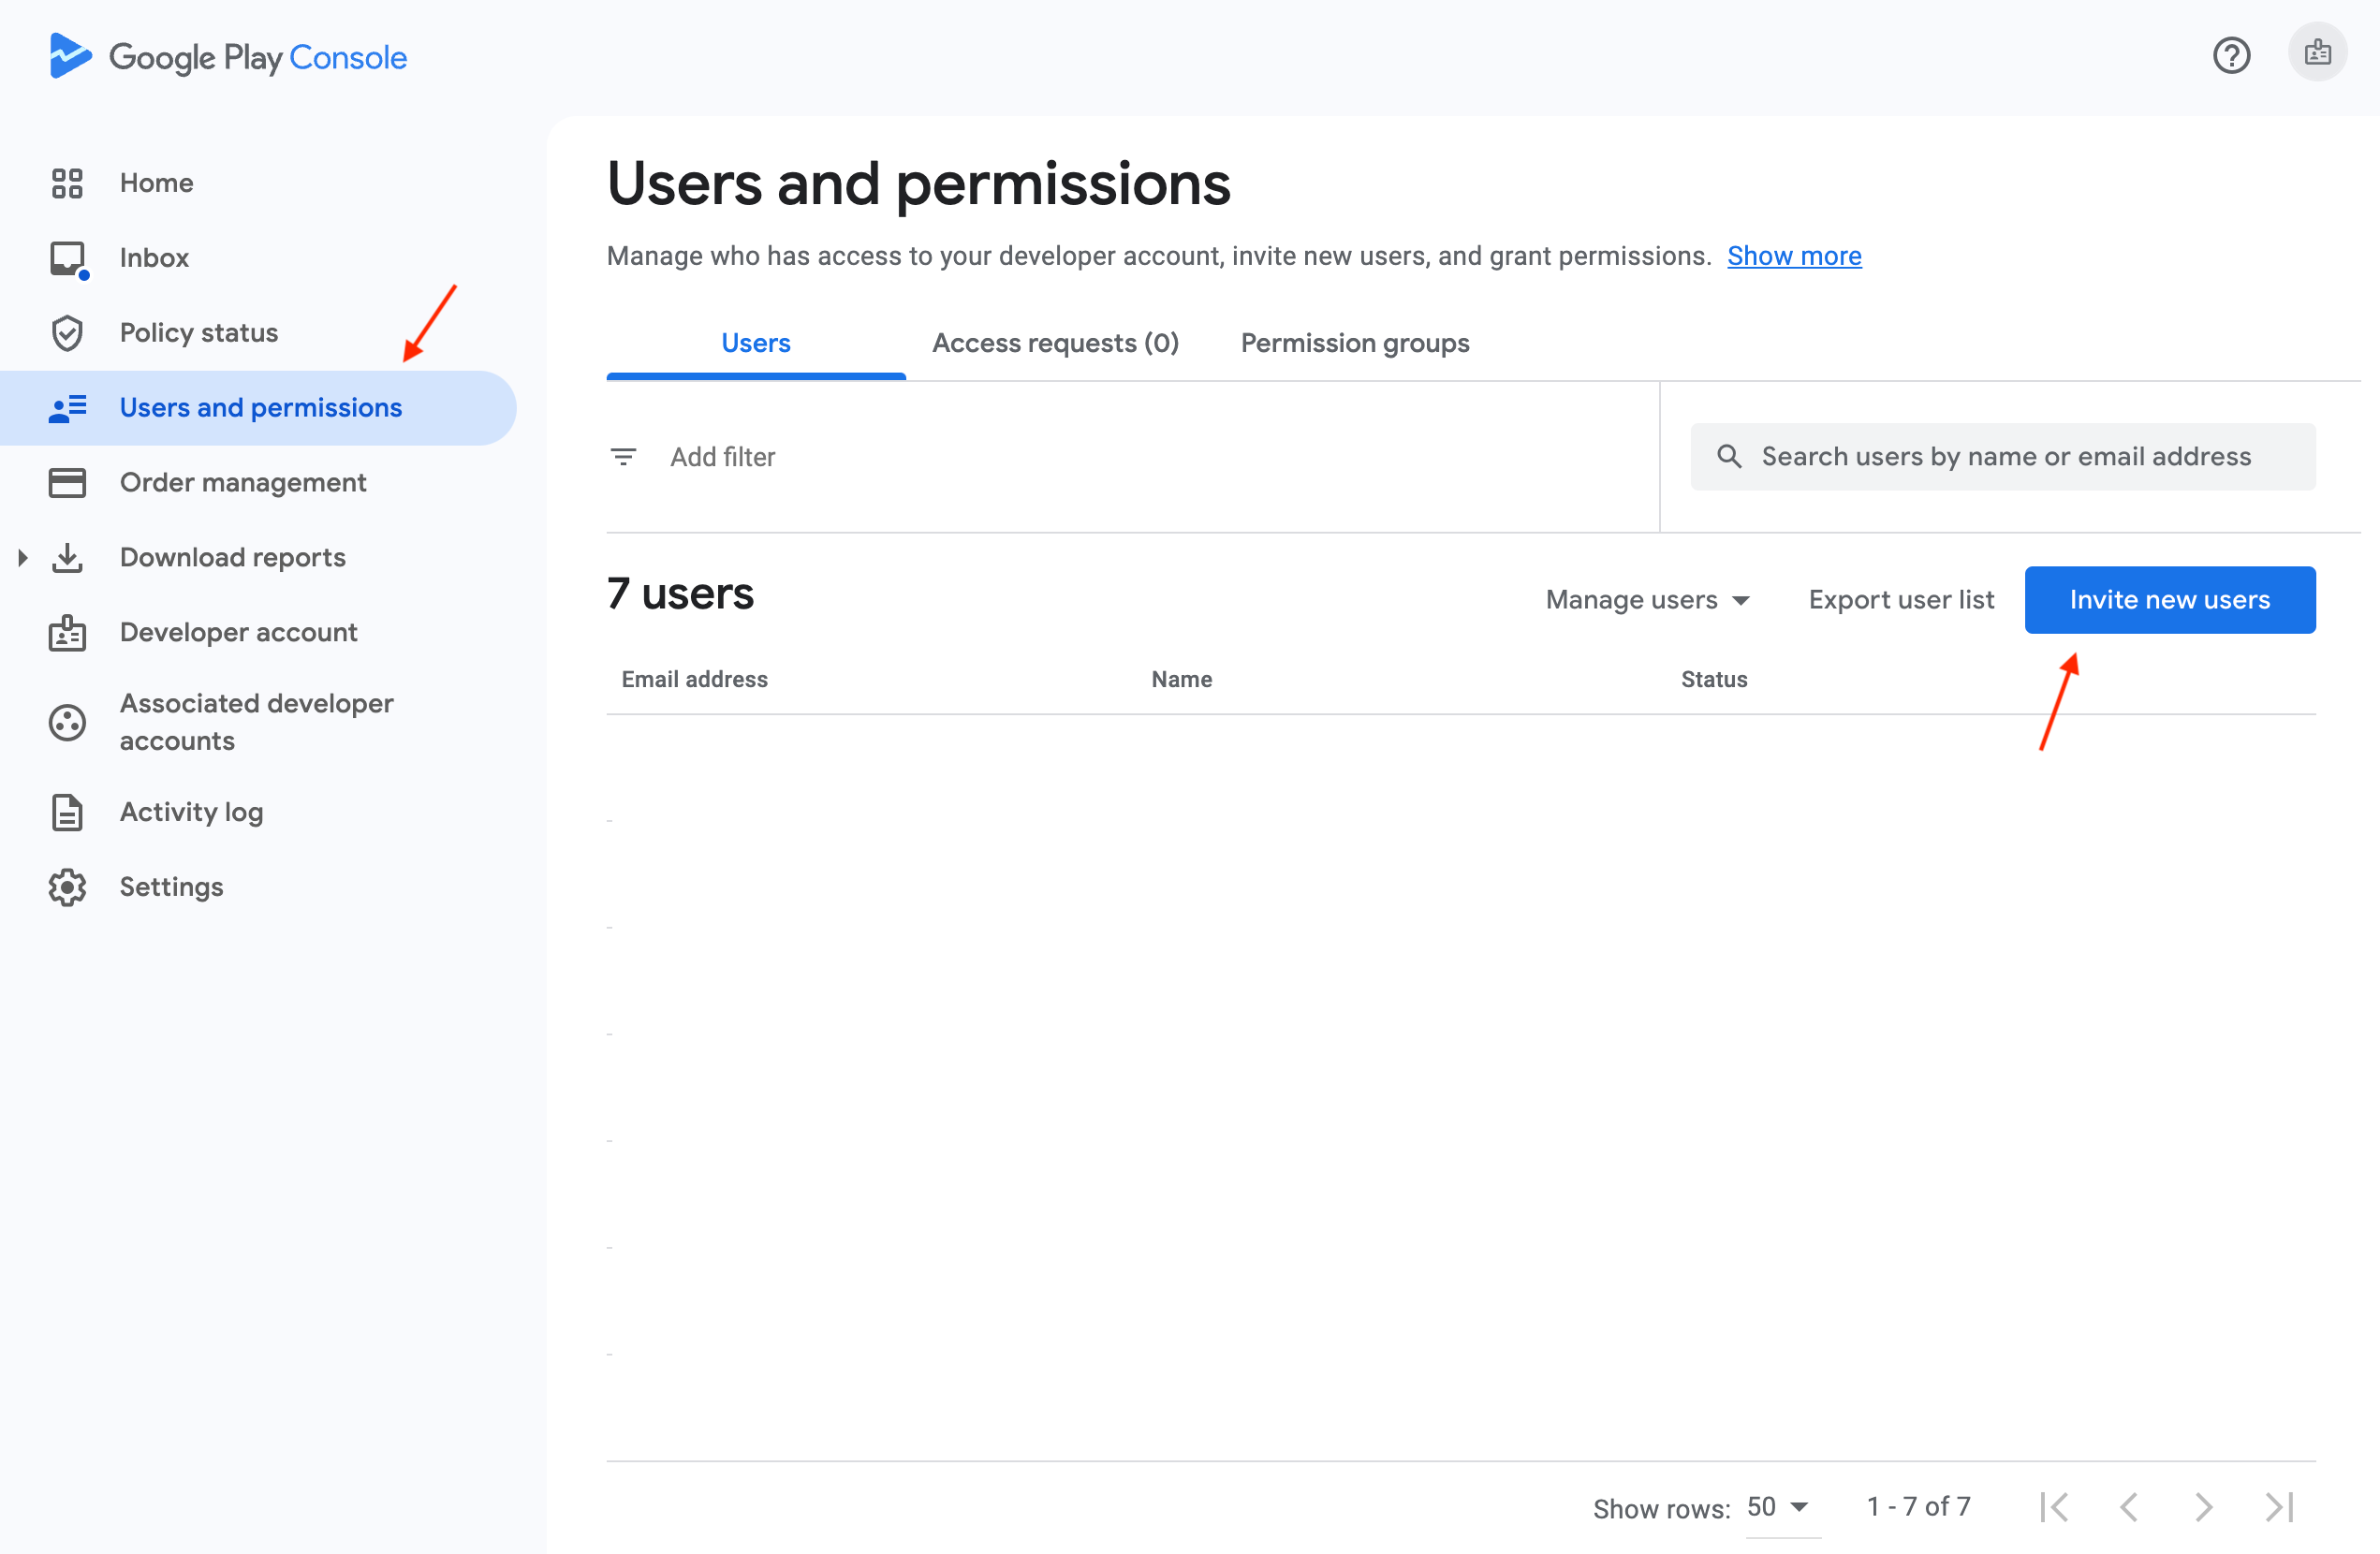
Paste the justtrack-iap-verification email address you copied earlier, and click Invite.
Then, switch to Account permissions, and give the service account the following permissions:
- View app information and download bulk reports (read only)
- View financial data, orders and cancellation survey responses
- Manage orders and subscriptions
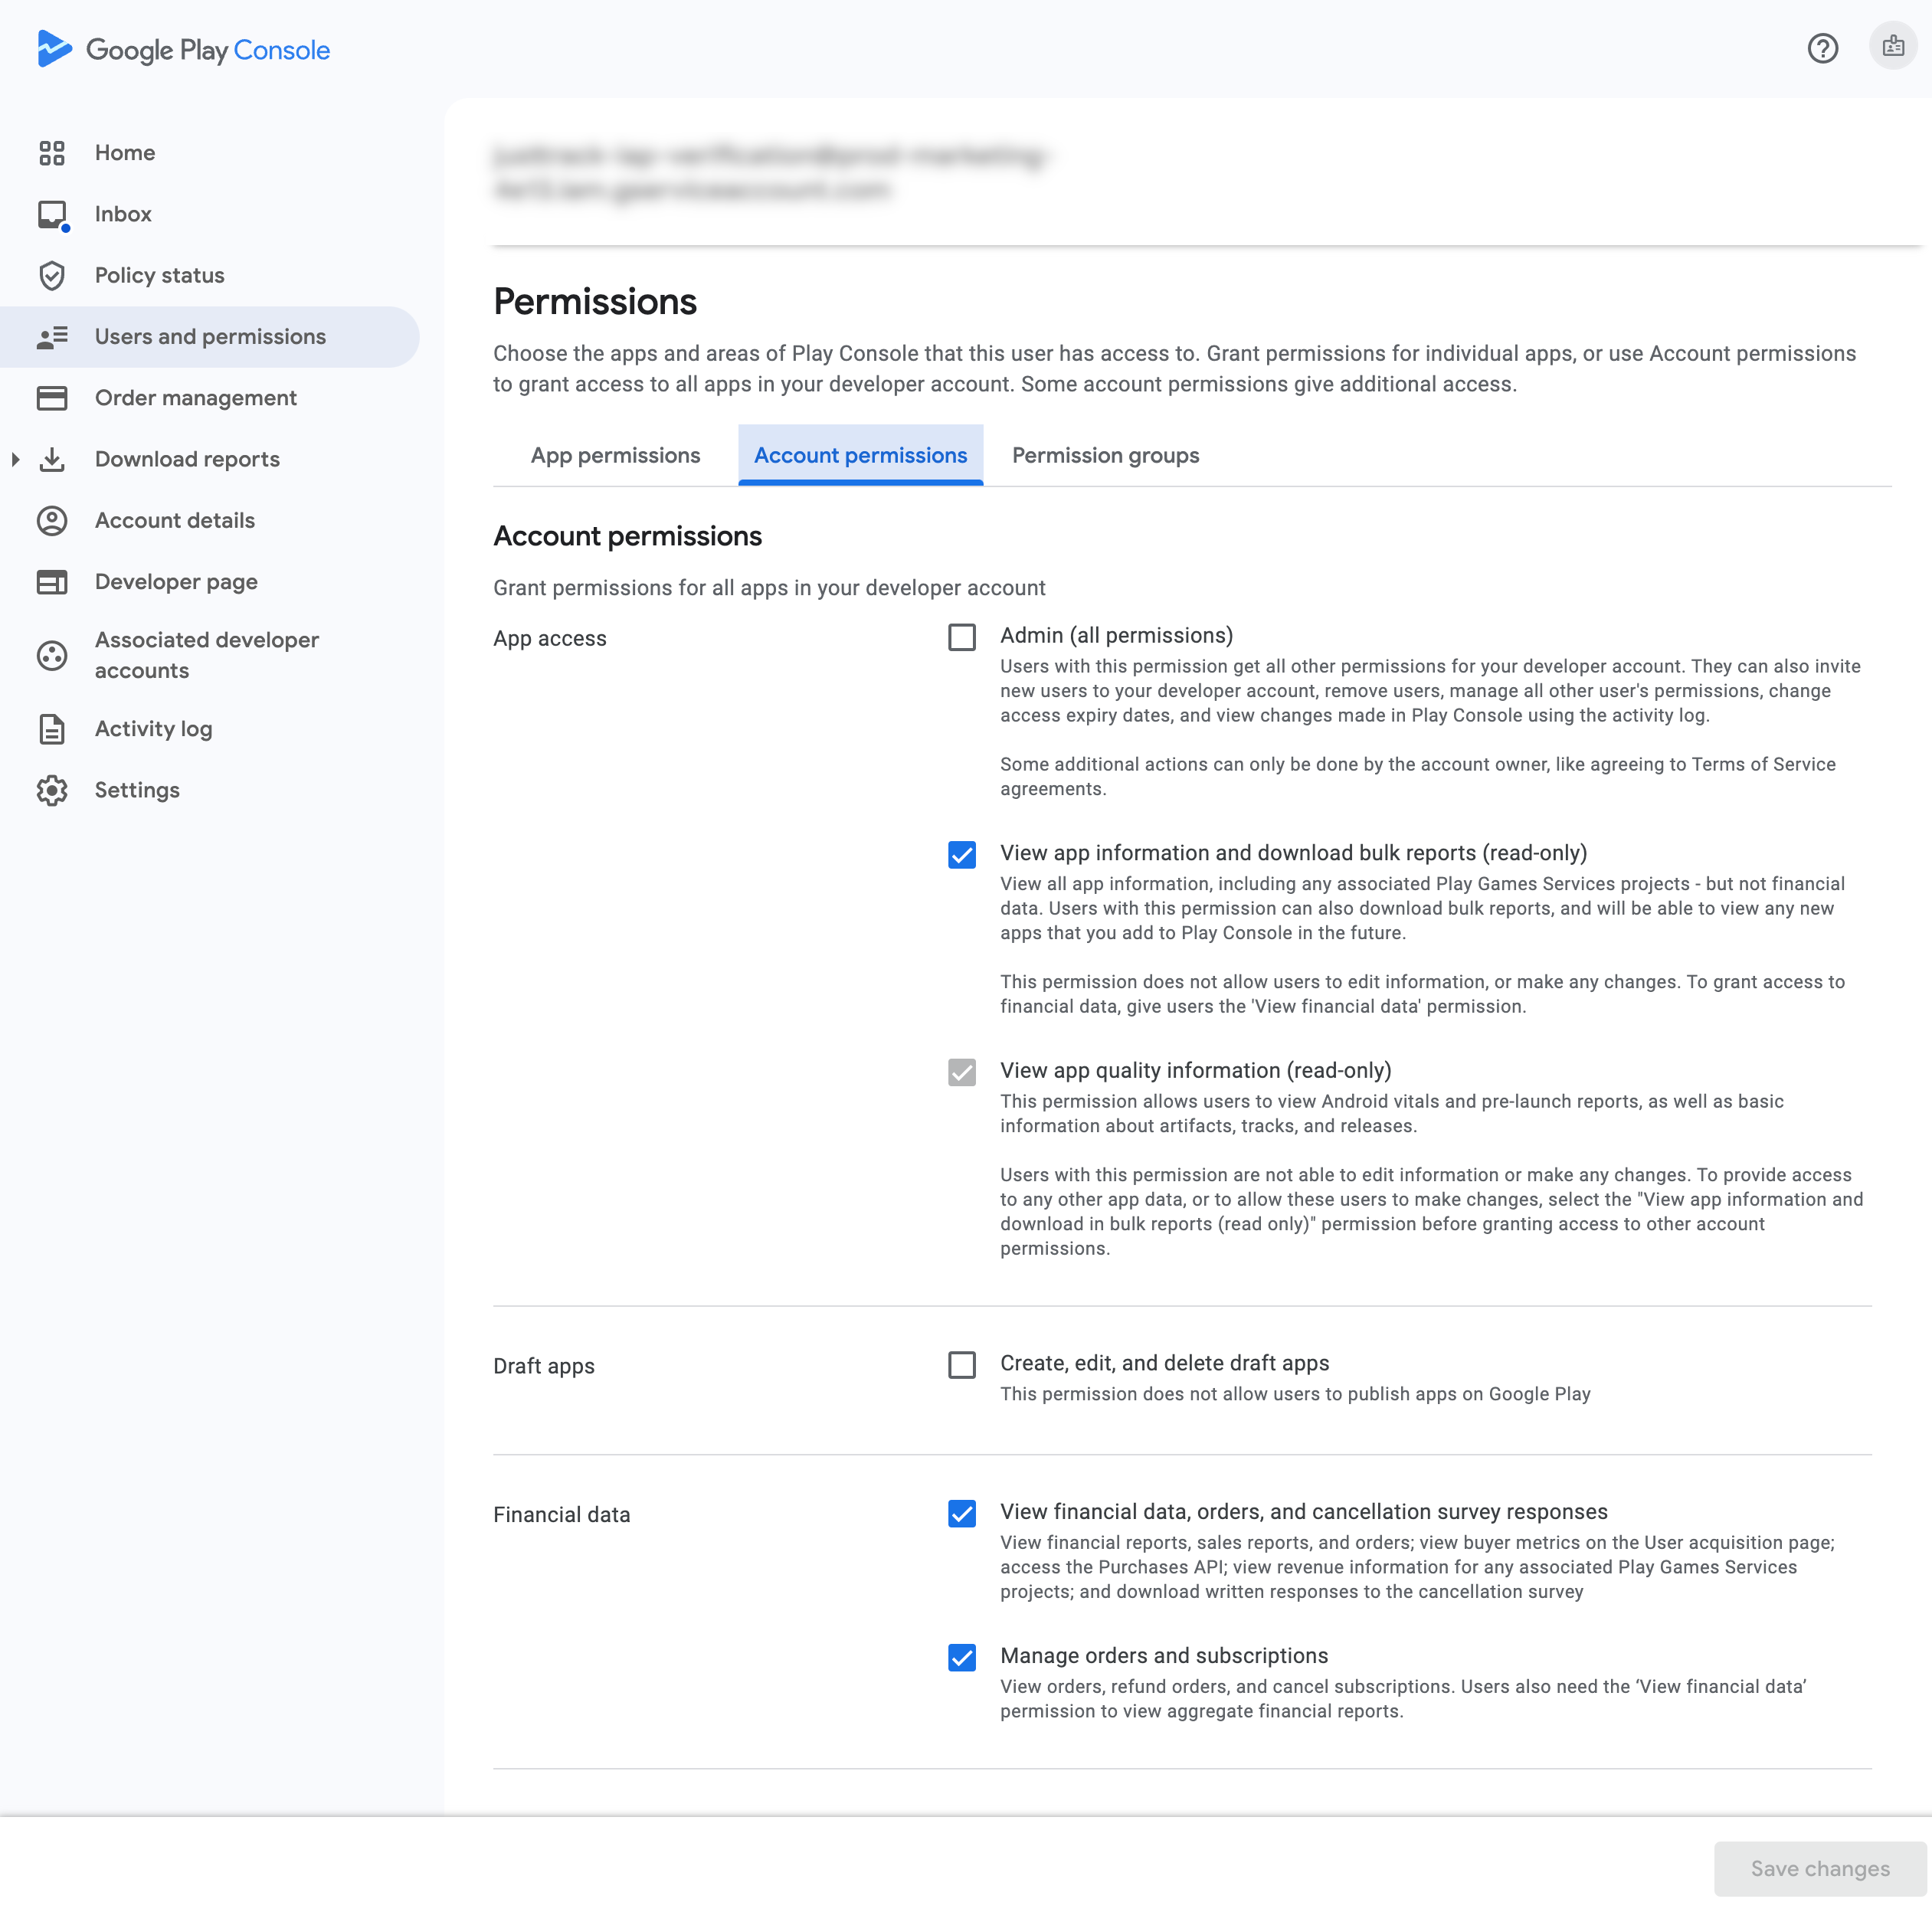
Click Save changes.
Configure real-time developer notifications
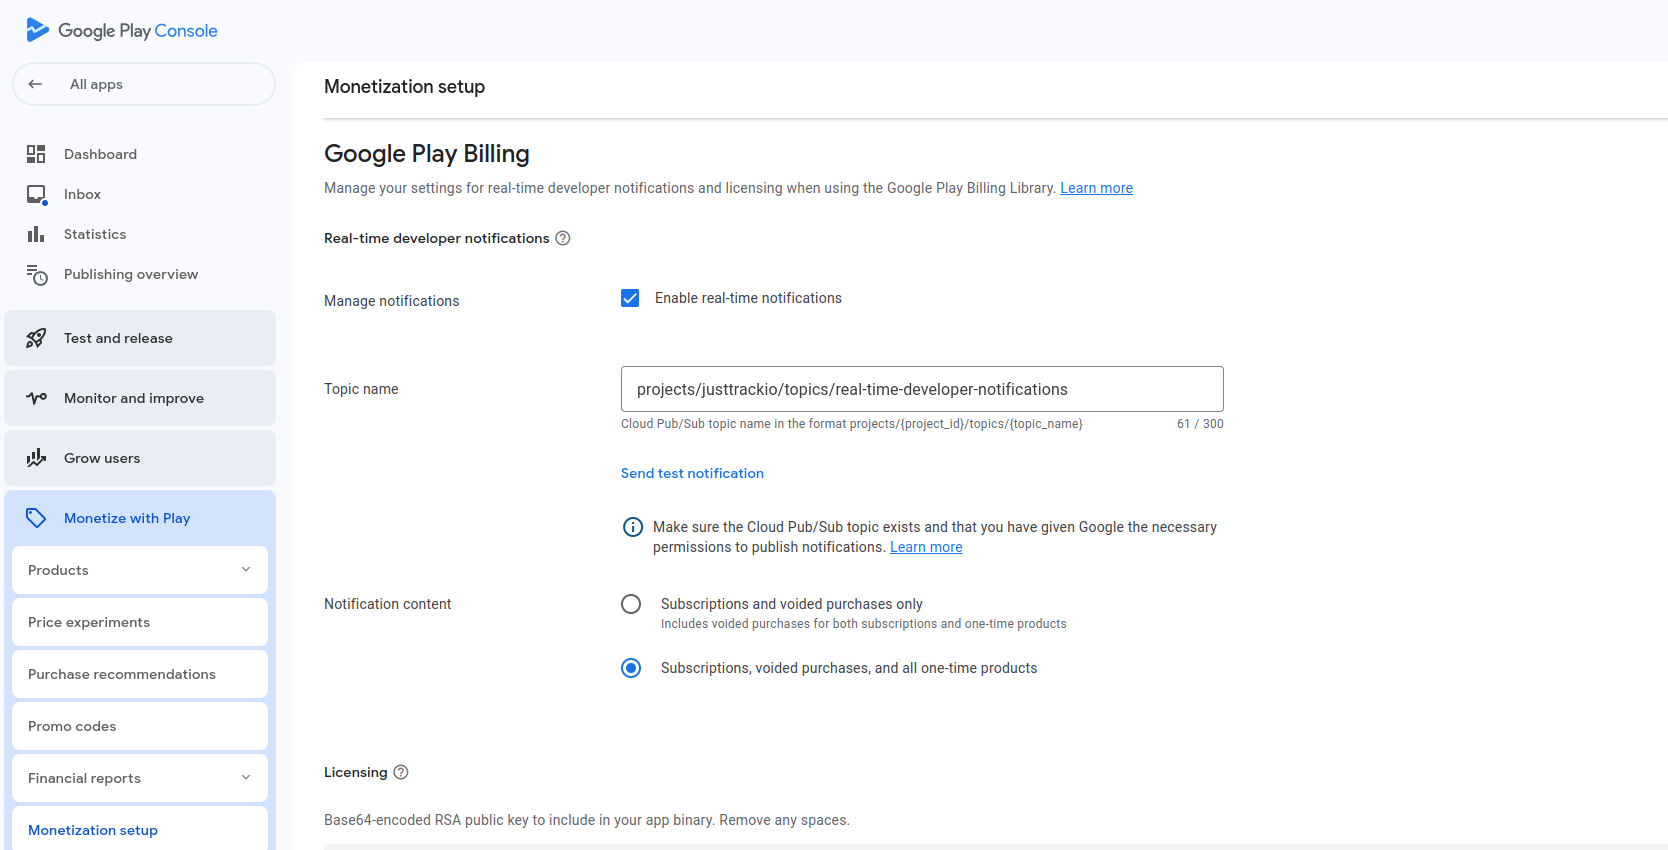
Now, you need to set the Topic name for Google Play Billing in order to send real-time developer notifications to justtrack so you can see them in your account.
From Home, navigate to the app you're trying to set up:
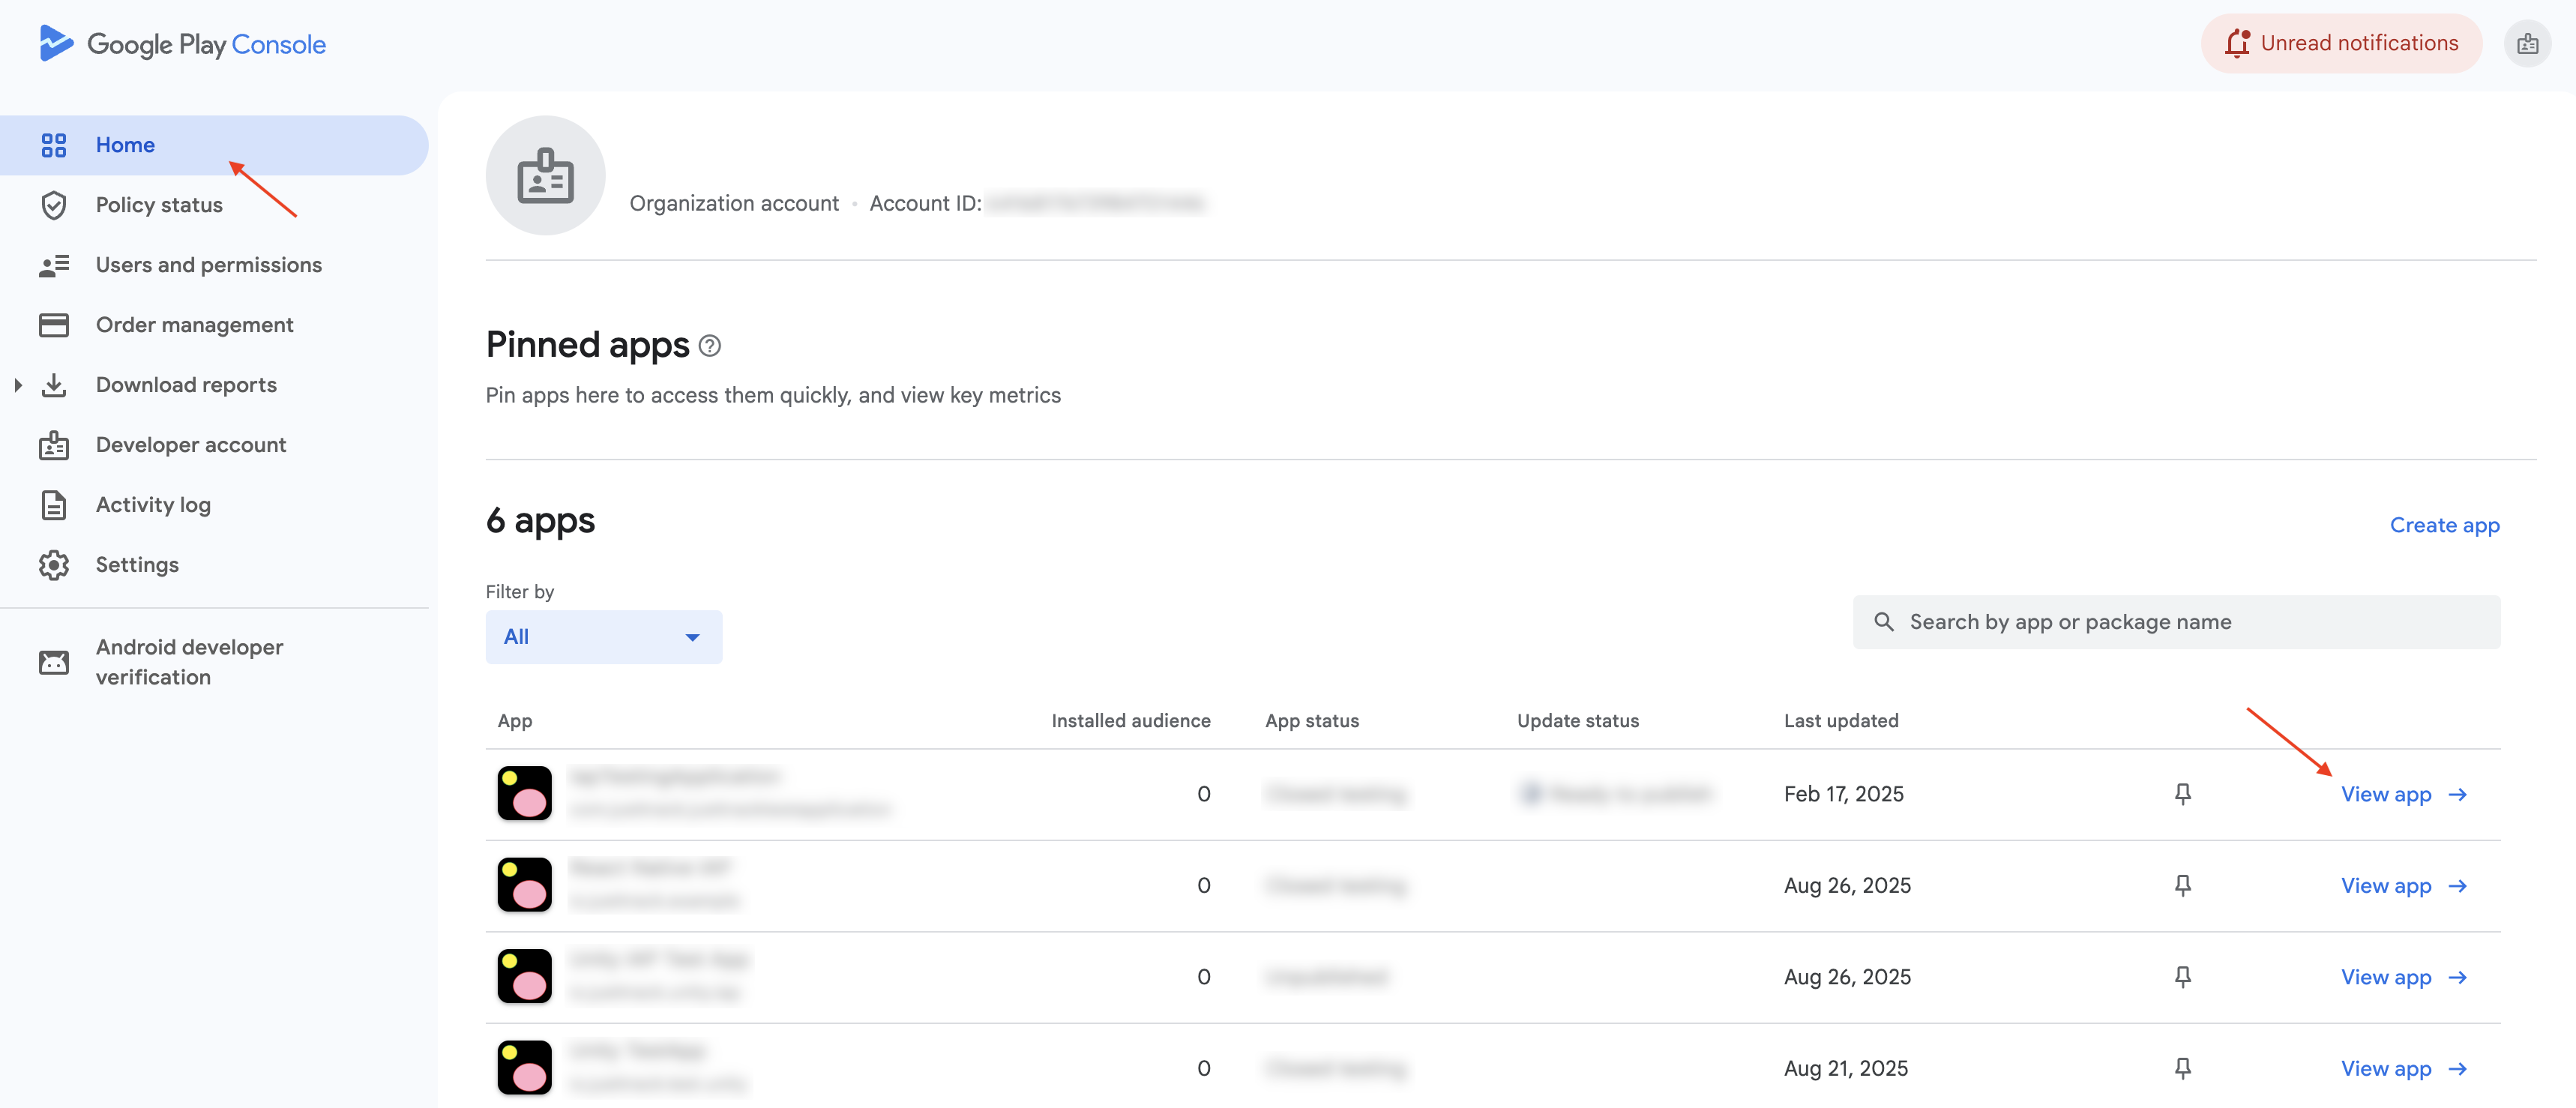
In the left navigation, go to Monetize with Play > Monetization setup. Then:
- Enable real-time notifications
- Set the topic name to
projects/justtrackio/topics/real-time-developer-notifications - Select Subscriptions, voided purchases, and all one-time products
Enable the Google Play Developer API
Now you need to enable the Google Play Android Developer API. To do so, perform the following steps:
- Go to this url, and log in, if necessary.
- Select the project you're using.
- Click Enable, if the option is available:

Configure your service account in justtrack
Now that you've configured your service account and enabled real-time developer notifications, you need to upload the JSON file you received when you created the key.
In justtrack, navigate to Admin > Apps:
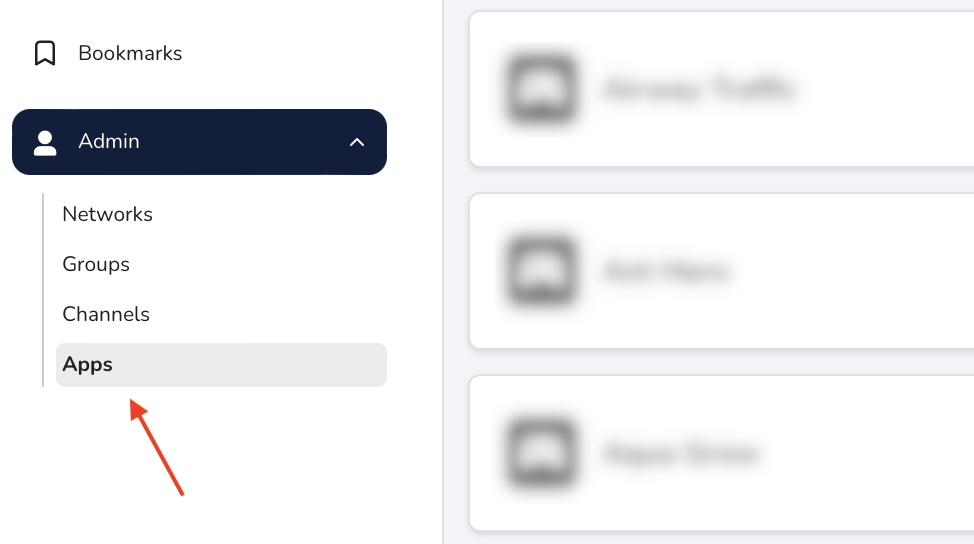
Here, you'll find the list of apps connected to your justtrack account. Next to the app for which you want to verify purchases, click See Details.
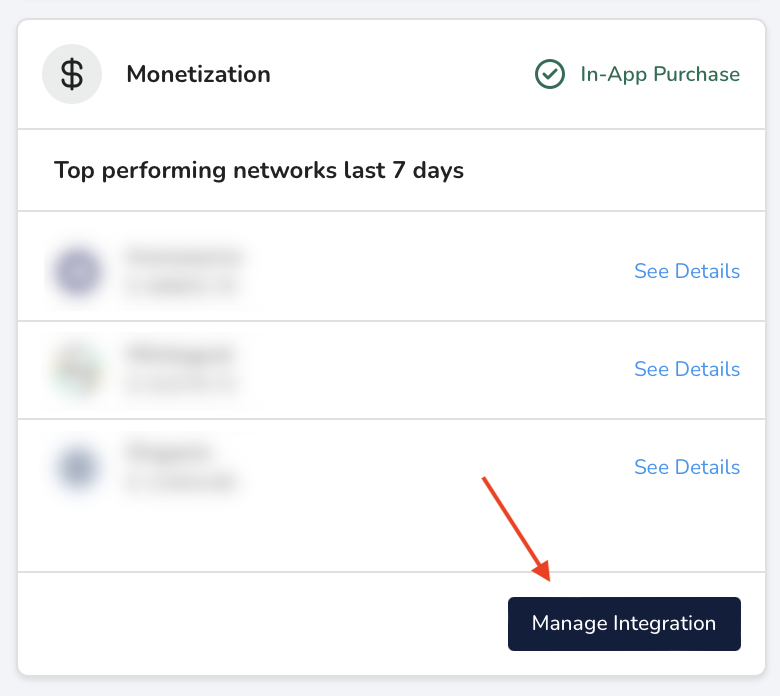
Now, you're in the App Hub. From here, you can configure how you monetize your app.
On the Monetization card, click Manage Integration:
On the Monetization page, click Purchase Verification Credentials:
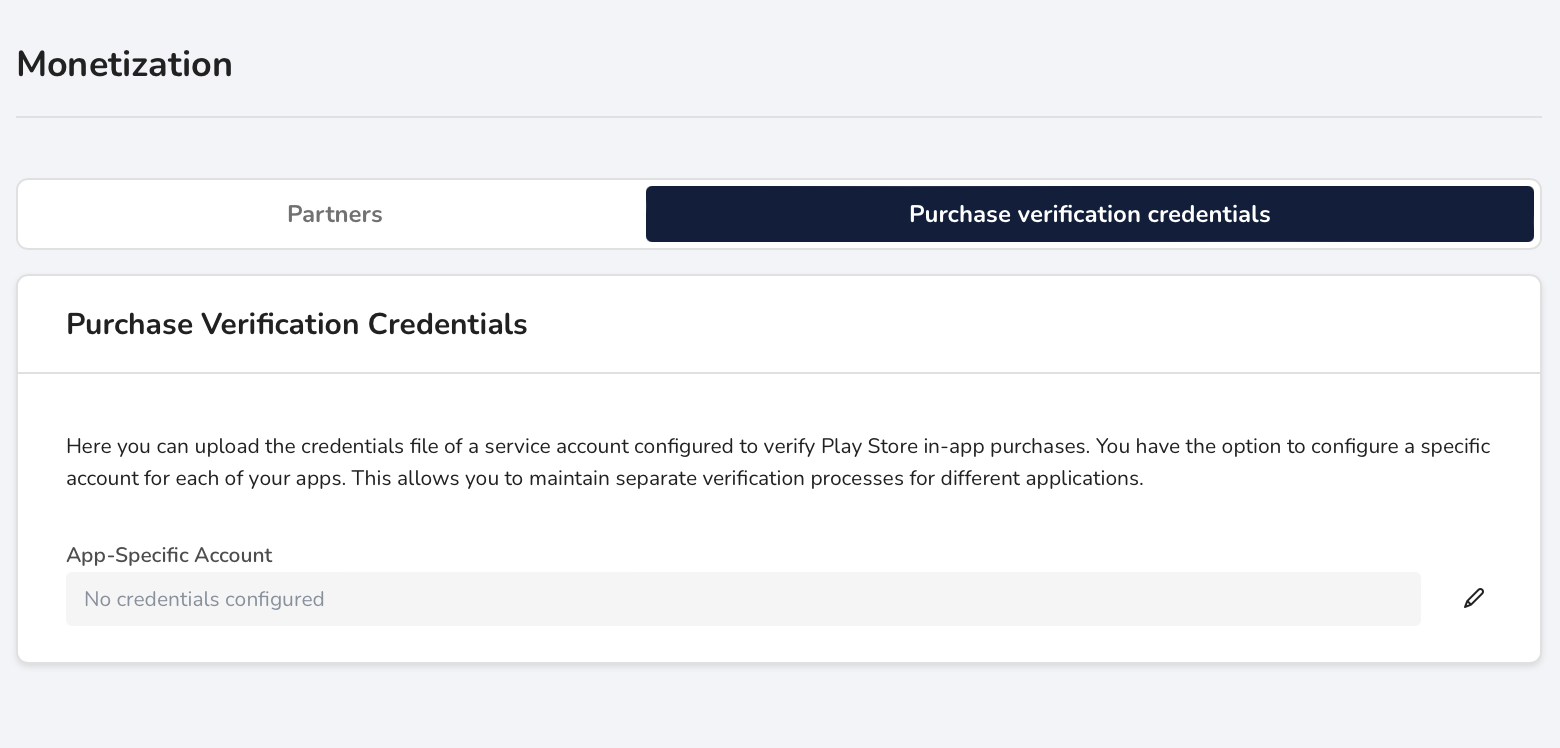
Here, you'll upload the JSON file you downloaded in a previous section. In the App Hub, you'll see an indication that you've successfully set up in-app purchase tracking.
It can take up to 48 hours for the permissions you configured for your new service account to propagate through Google's internal systems. Therefore, it might take a while to see in-app purchase revenue for your app.
You can now start forwarding in-app purchases from the justtrack SDKs, and you'll see the revenue you make from them on the justtrack dashboard.